Cable Leads to Tectron Anode Cells
Product Support and Customer Service
For Further support visit our Contact Page
Safety
Think and act in a safe manner. Always disconnect power and use a lockout before you work on the E-coat system, or any of the related subsystems. Observe any confined space conditions. Use the appropriate safety equipment and clothing for the task. Please carefully read all the instructions listed below to familiarize yourself with the project before attempting to perform any of the work.
Required Materials
None
Required Tools
- 2 Each—1/2” Wrench
General
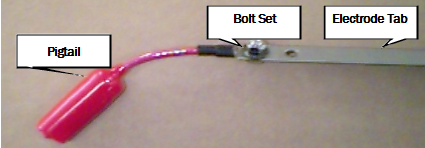
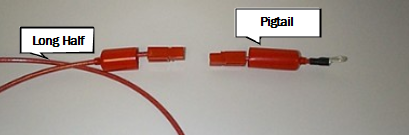
Cable Leads supply power to the TECTRON ME Cell. Cable Leads are manufactured in two parts for easy installation and servicing. The first part (“pigtail”) is directly attached to the TECTRON Electrode. The second part (“long half”) is attached to the bus bar. The two halves connect via the red quick disconnects. Each connector is covered with a flexible PVC “boot” to ensure long life and durability.
Step 1
Use only UFSc supplied hardware (bolt, nut and washer) in the installation of the Cable Lead.
Step 2
Place the Cable Lead “Pigtail” on the back side of the Electrode tab. Insert the bolt through the Cable Lead then the tab. Place the compression washer on the bolt, then the nut and tighten. Continue to tighten until the compression washer is compressed.
Step 3
Attach the dead end of the “Long Half” to the bus bar. You may be using a UFSc supplied Connector Lug Set Assembly Kit, which will assist you in this task.
Step 4
Locate both red connectors from both halves of the Cable Lead and connect. Slide red boots over the connectors
BULLETIN 993003