Roof Cell PN's 701031 & 701032
Product Support and Customer Service
For Further support visit our Contact Page
Safety
Think and act in a safe manner. Always disconnect power and use a lockout before you work on the E-coat system, or any of the related subsystems. Observe any confined space conditions. Use the appropriate safety equipment and clothing for the task. Please carefully read all the instructions listed below to familiarize yourself with the project before attempting to perform any of the work.
Required Materials
- PVC Heavy Bodied Cement and primer
Required Tools
- Torque Wrench ( 24mm)
- Screw Driver
- 2 Wrenches (13mm)
- Scissors
General
Initial installation of the ME Cells should be done immediately before the tank is filled with paint so the ME Cells can be checked for leaks. The less time the ME Cells are in the tank before the paint fill, the less likely they will be damaged.
Step 1
Unpack the ME Cells carefully! Remove any exposed nails or screws from the shipping container which may cause damage.=Step 2= Remove the manifolds from skid or crate.
Step 3
Place manifolds in tank at the proper locations and use best clamping method. Support manifold at the support locations located on the drawing.
Step 4
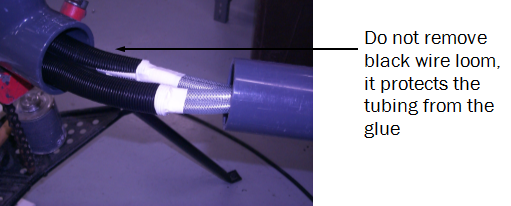
After manifold is installed, the electrode will be next. Use the 5/16” bolt set included to attach electrode to bulkhead. Trim the supply tubing to desired length, then place on bulkhead with worm clamp.
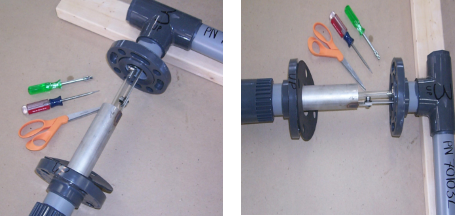
Note: To connect shell to manifold use the 5/8” SS Hardware with shipment. ONLY TORQUE TO 25-30 FT LBS.
Step 5
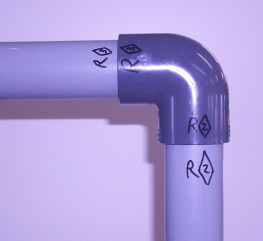
After shells and electrodes have been installed the piping is the next step. Follow the match marks along with the pictures to insure the right piece of pipe is used.
Step 6
Look inside manual for Field Assembly Drawings showing match marks.