Repairing Welded PVC Overflow Nozzles
Product Support and Customer Service
For Further support visit our Contact Page
Safety
Think and act in a safe manner. Always disconnect power and use a lockout before you work on the E-coat system, or any of the related subsystems. Observe any confined space conditions. Use the appropriate safety equipment and clothing for the task. Please carefully read all the instructions listed below to familiarize yourself with the project before attempting to perform any of the work.
Required Materials
- Type I Break - PVC Primer and Cement
- Type II Break - ¼" NPT x ½" (UFSc PN 090002) or ½" NPT x ¾" (UFSc PN 090005) Hose barb Adapter, Polyethylene (or equal).
Required Tools
- 7/16" Drill for ¼" NPT or 23/32" Drill for ½" NPT Tap
- Small Hand Saw
General
Even though UFSc takes care to protect the PVC overflow nozzle during shipment, sometimes they can still break. If there is obvious shipping damage to the cardboard shipping container, then you should ask for assistance from your shipper. If the Membrane Shells are leaned up against a wall, they can fall over and easily break off the welded PVC Overflow Nozzle. Protect the membrane Shells before they are installed from falling objects and in aisle ways where people may step on top of the boxes. Make every attempt to keep the Membrane Shells in the packaging material until they are to be installed. When the PVC Overflow Nozzle breaks off, there are generally two different types of fractures. In the first case, the entire PVC Hose barb and the PVC weld bead break off as one piece (referred to as a Type I, hereafter). In the second and most common case, only the PVC Hose Barb above (or further away from the long axis of the Membrane Shell) breaks off, leaving only the shank of the PVC Hose barb and the PVC weld bead attached to the Neck of the membrane Shell (referred to as Type II, hereafter).
TYPE I BREAK
- Apply PVC primer to the drilled hole in the Neck (Membrane Shell) and the lower portion of PVC Hose barb. Repeat applying primer to both surfaces a second time. (See Figure 1.A.)
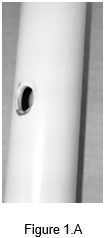
Figure 1.A
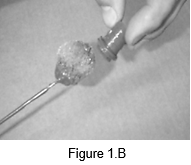
- Apply the PVC cement to the lower portion of the PVC Hose barb fitting. (See Figure 1.B.)
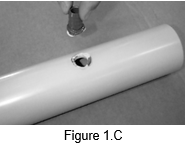
- Quickly insert the part and align it so the weld bead makes contact for its entire span around the Hose barb adapter. Clean off excess glue from inside the neck. (See Figure 1.C.)
- If this method does not prove satisfactory, then remove the repair and follow instructions for Type II Break.
TYPE II BREAK
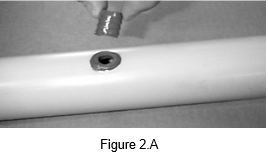
- Use a 7/16" drill bit for PN 090002 (½" overflow nozzle), if necessary, and use a ¼" NPT tap by hand to create threads. -OR - Use a ¾" drill bit for PN 090005 (¾" overflow nozzle) and use a ½" NPT tap by hand to create threads. (See Figure 2.B.) Do not enlarge the hole.
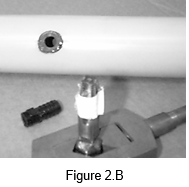
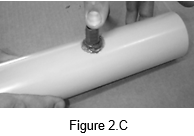
- Use a small saw to remove all but the last four threads on either 090002 or 090005 and apply Teflon tape. Screw new hose barb into threaded hole. Task complete. (See Figure 2.C.)
BULLETIN 990149'