Floor Shell Replacement
Contents
Product Support and Customer Service
For Further support visit our Contact Page
Safety
Think and act in a safe manner. Always disconnect power and use a lockout before you work on the E-coat system, or any of the related subsystems. Observe any confined space conditions. Use the appropriate safety equipment and clothing for the task. Please carefully read all the instructions listed below to familiarize yourself with the project before attempting to perform any of the work.
Required Materials
- S-80 Heavy Bonded Cement
- S-80 PVC Primer
Required Tools
- Pipe or Strap Wrench
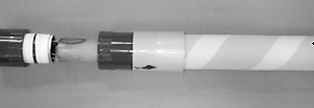
Step 1
Remove the Shell from the Bulkhead, leaving the Electrode attached to the Bulkhead. (see below)
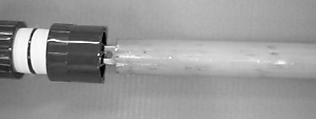
Step 2
Slip the new female adapter over the Electrode and tighten to the Bulkhead. (see below)
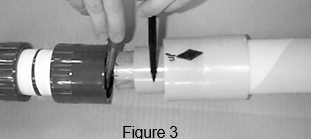
Step 3
CAREFULLY slip the new Shell over the Electrode and apply PVC Primer and PVC Cement to the female adapter and the neck of the Shell. (NOTE: This procedure will require two people. One to shake the shell so the Electrode is properly seated and one to guide the Shell.) (see below)
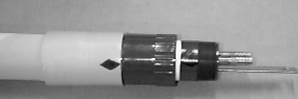
Step 4
The diamond on the Shell should match up with the diamond on the Bulkhead. Both should be in the "up" position. (see below)
BULLETIN 993145